
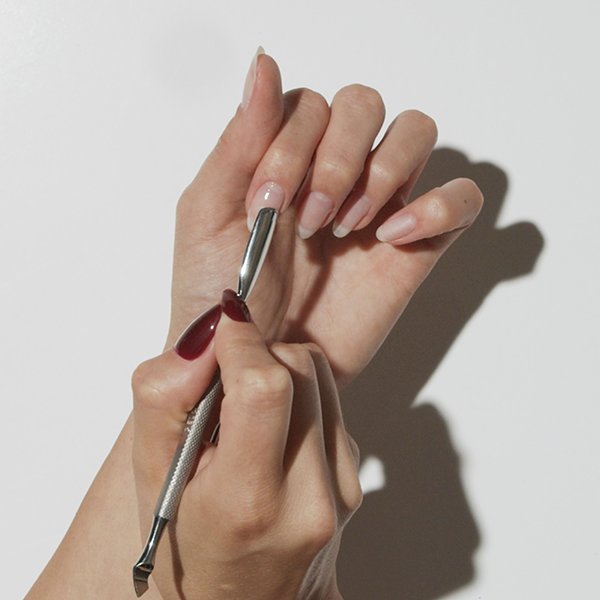
1. Push your Cuticles Back
Apply Cuticle Softener to the cuticles. This enzymatic solution softens the skin around the nails to facilitate a gentler and deeper clean. Push the cuticle back using the arched end of the Gel Removal Tool.
1 / 4


Introducing our new Heating Mittens, the ultimate tool for a faster gel removal. Now exclusively designed by GELCARE with enhanced comfort and durability, these mittens are crafted from soft, silky smooth polyvinyl. Experience effortless temperature control with three heat settings and a safe auto-shutoff feature.
Made from smooth and durable polyvinyl
Low, medium and high heat settings
60-minute auto-shutoff


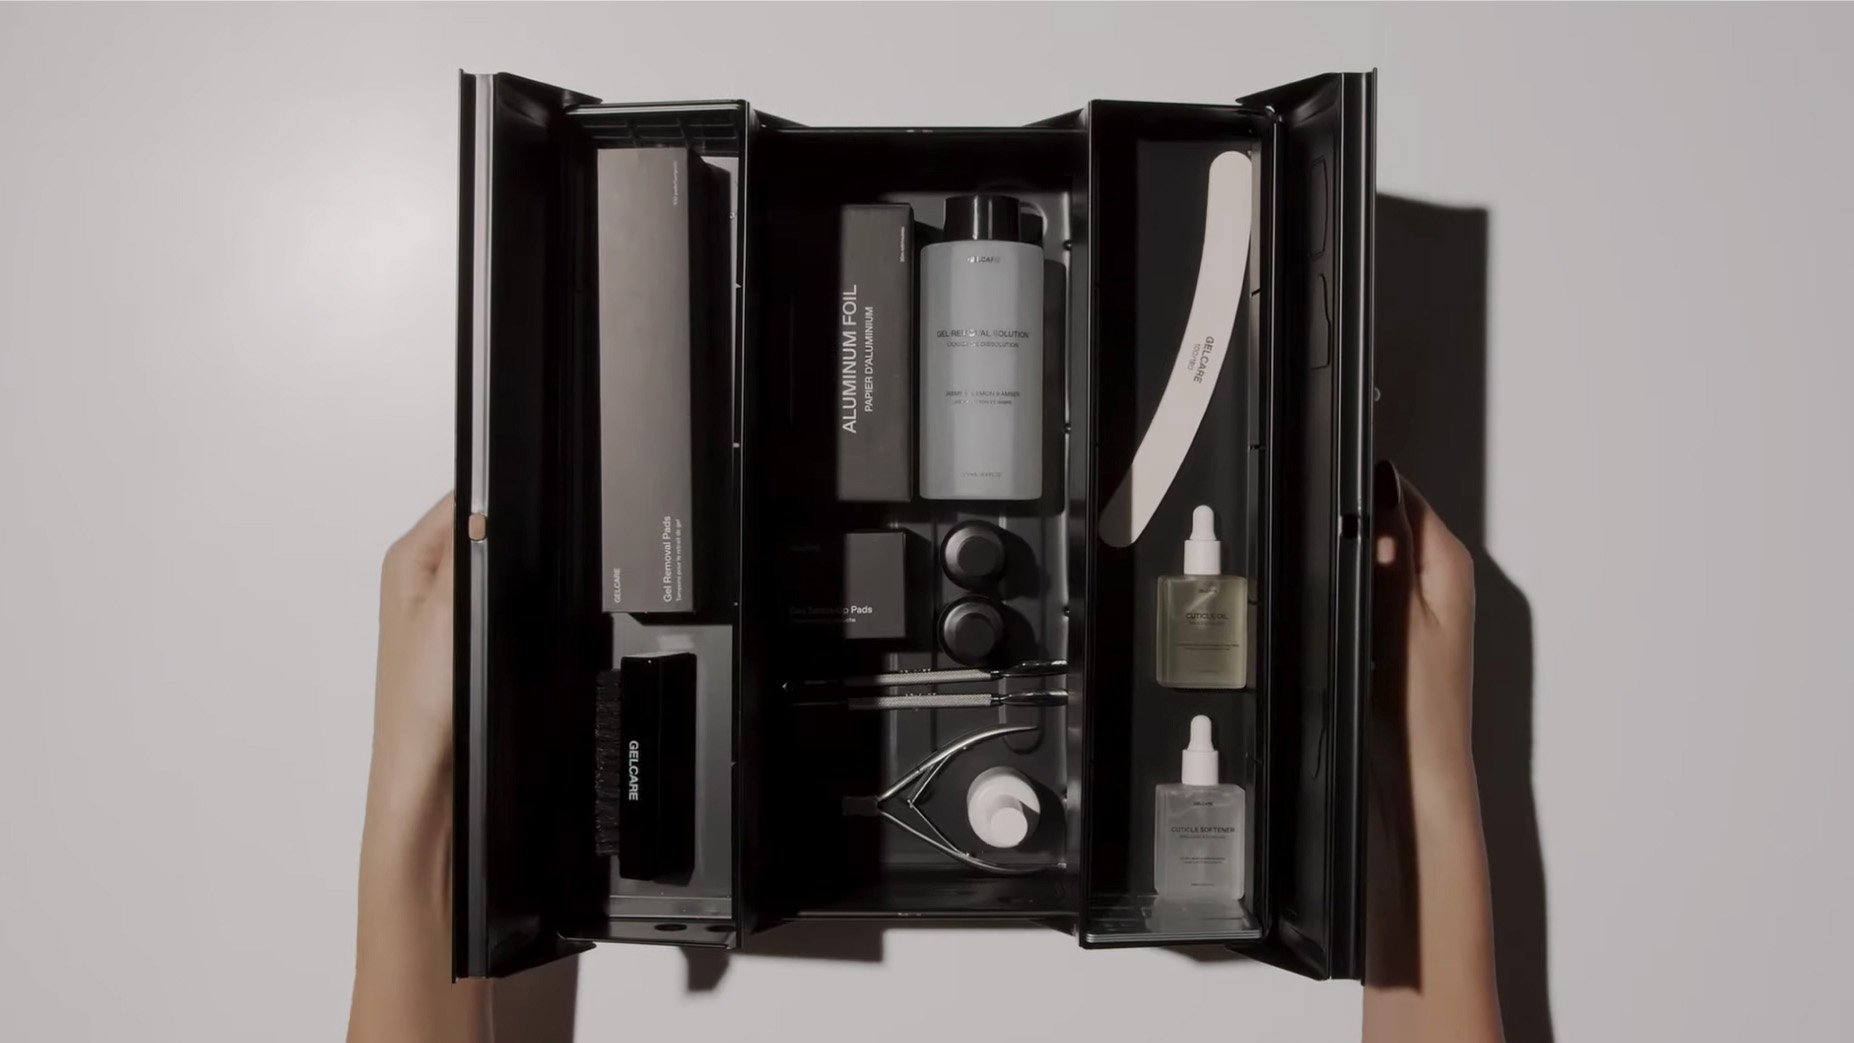
A Gelcare X Toyo Steel Co. collaboration. The ultimate storage box for your small manicure tools. This minimalist, durable, rugged, yet beautiful toolbox is made in Japan and has been awarded both the Good Design Award and the Long Life Design Award. The cantilever design makes finding anything inside clean and oh-so-easy. Guaranteed not to rust.
Explore our step-by-step video tutorial below for visual guidance, or enhance your skillset by downloading our comprehensive manicure instruction booklet.

Apply Cuticle Softener to the cuticles. This enzymatic solution softens the skin around the nails to facilitate a gentler and deeper clean. Push the cuticle back using the arched end of the Gel Removal Tool.

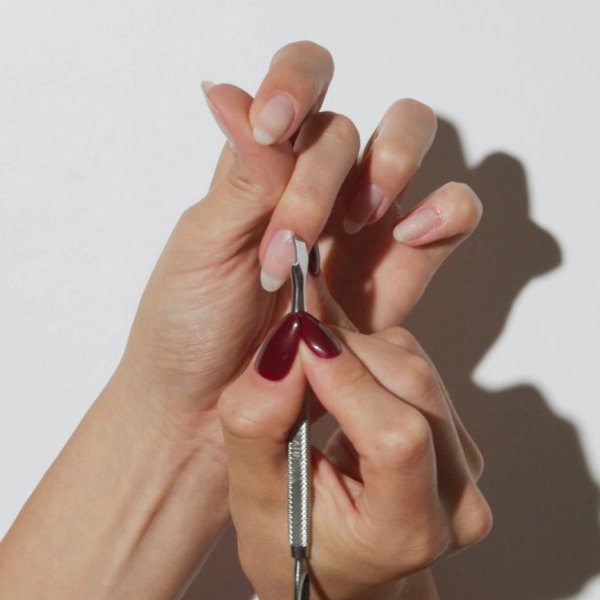
This step is unique to the Gelcare technique. With the bladed end of your Gel Removal Tool, use small circular motions to dislodge any dry skin stuck under the cuticles. If needed, add more Cuticle Softener to the nails to help loosen the skin further when executing this step.


Buffing not only smoothes the nail surface, it allows for better Base Coat adhesion by creating a subtle texture on the surface of the nails.

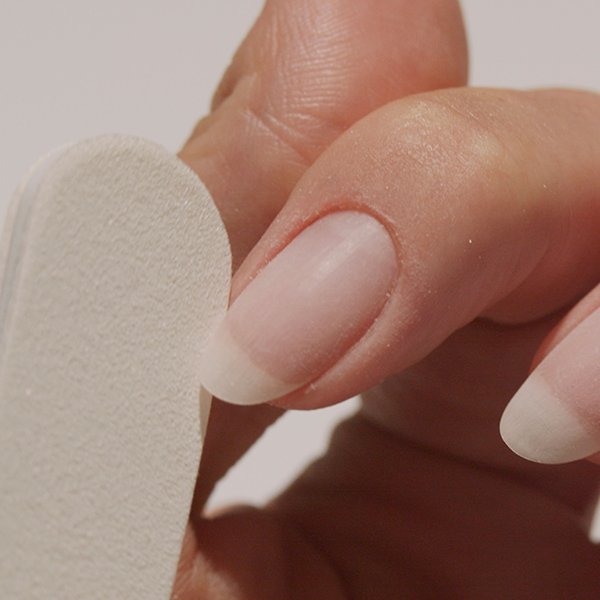
Using the more abrasive side (100) of the Curved Nail File, we want to file the excess skin on the sides of the nails first, which often causes the gel to lift. To do this, sit file in the crease of the lateral fold and file gently. Apply pressure towards the side of the nail and not downwards, which can cause paper cuts.

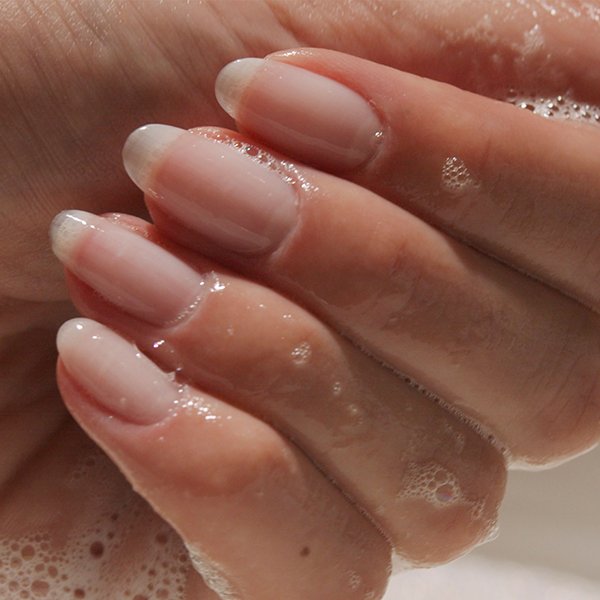
Wash your hands with soap and water. Using the Nail Scrubber Brush, scrub over and under your nails. Washing your hands also prepares the skin for the next step: cuticle trimming. When the skin is damp, the cuticles soften and become translucent, making them easier to trim.

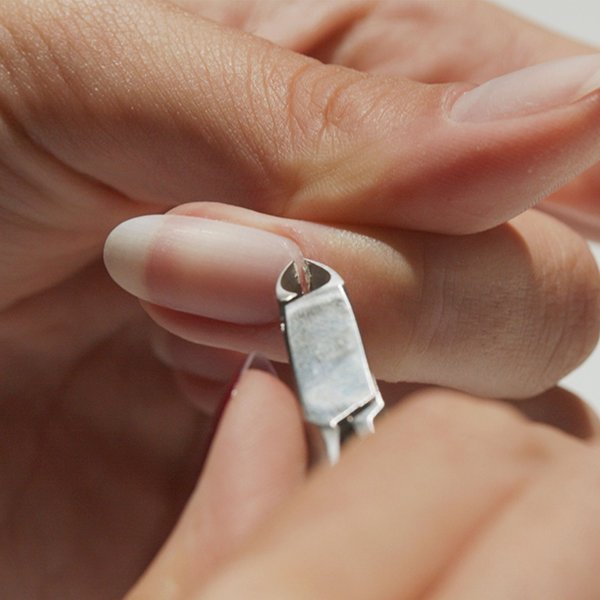
If necessary, trim off excess cuticles with the Cuticle Nipper. Make sure to always look between the blades so you know exactly where you are about to cut. For a clean trim, use the tip of the blades and gently cut the cuticle in one long piece. If cutting your cuticles scares you, skip this step!

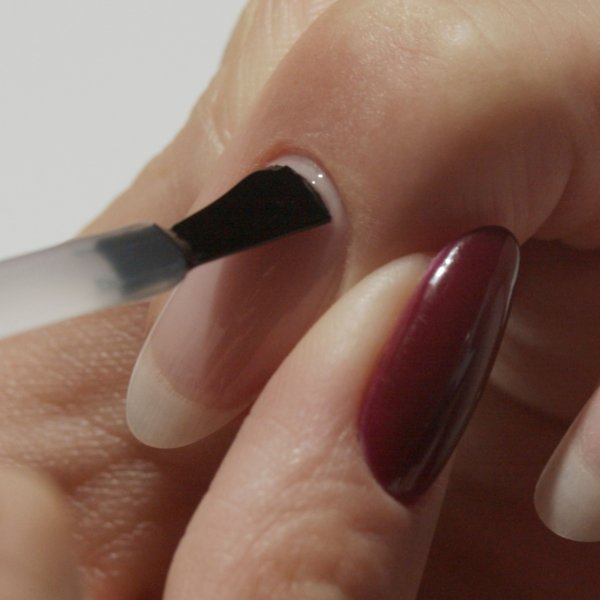
On one nail at a time, apply an even layer of Base Coat and immediately set your application by curing the gel under the LED Lamp for 5 seconds. If you do not set the gel, the application will not be as precise.
Once the base is applied and set on all nails, cure for 60 seconds under the LED Lamp. Ensure you slide your hand all the way into the lamp and that your middle finger reaches the embossed trackpad.

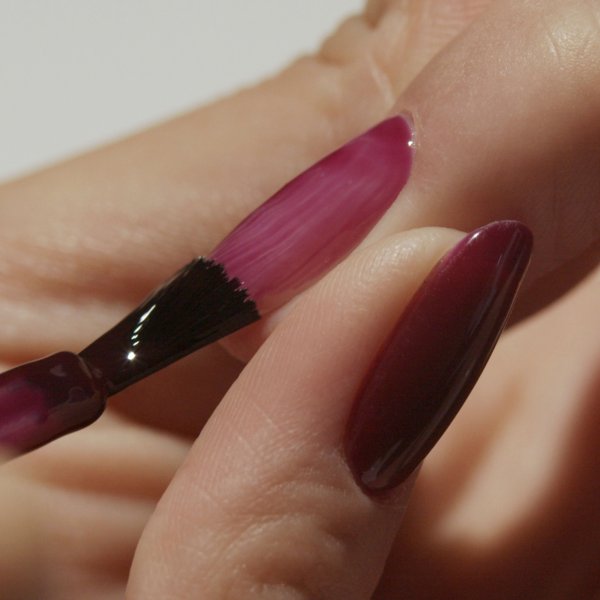
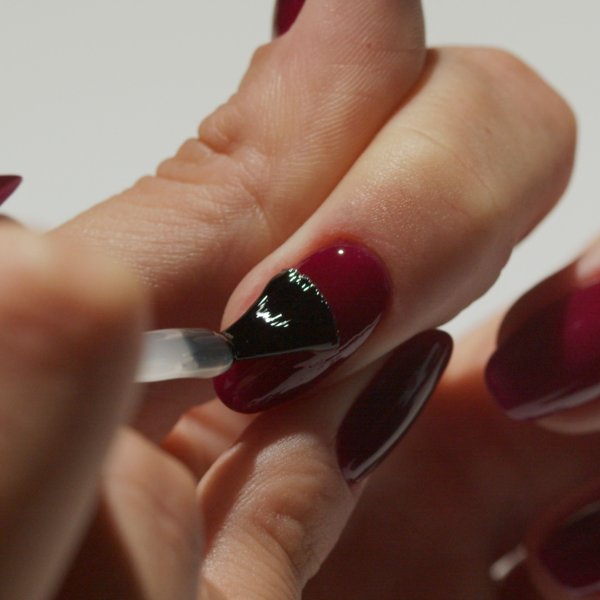
Apply 3 thin layers of colour. Cure each layer for 60 seconds under the LED Lamp.
Make sure to work with only a small amount of gel on your brush for a flawless application. Use the sides of the bottleneck to wipe off any excess gel. Start by applying the colour to the centre of the nail. Slide the gel up towards the cuticles without touching them. With long and fluid strokes, glide the gel down the sides of the nail to the tip.

Apply a layer of Top Coat. Cure for 3 minutes under the LED Lamp.